In the world of food photography, lighting plays a vital role in capturing enticing images that make viewers’ mouths water. Whether you’re a professional food photographer or an aspiring enthusiast, understanding the different lighting options available to you is essential for creating stunning food photographs. Two primary choices stand out: natural light and artificial light.
In this blog post, we will explore the pros and cons of each approach and provide valuable tips to help you make the most of both natural and artificial light sources. By the end, you’ll be equipped with the knowledge to enhance your food photography skills and create captivating images that showcase your culinary creations in the best possible light.
Understanding Natural Light
Characteristics of Natural Light for Food Photography
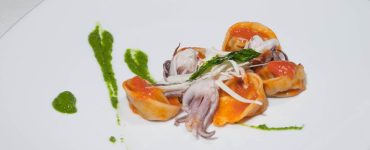
When it comes to food photography, natural light possesses unique characteristics that can significantly enhance the visual appeal of your images. One key attribute of natural light is its softness and diffused quality. Unlike harsh artificial lighting, natural light casts gentle shadows and creates a more natural and pleasing look for food. This softness helps to bring out the textures and details of the food, making it more visually enticing.
Another important aspect of natural light is its directional nature. Depending on the time of day and the position of the sun, natural light can create interesting shadows and highlights that add depth and dimension to your food photographs. Experimenting with different angles and directions of natural light can result in captivating compositions that highlight the best features of your culinary creations.
Best Times of the Day for Natural Light Photography
To make the most of natural light in your food photography, it’s essential to understand the optimal times of the day when natural light is most favorable. The morning light, just after sunrise, offers a soft and warm glow that can create a cozy and inviting ambiance for breakfast or brunch-themed food photography.
The golden hour, which occurs during the first hour after sunrise and the last hour before sunset, provides a magical, warm light that beautifully enhances the colors and textures of your food. During overcast days, when the sky is covered with clouds, the diffused light creates a soft and even illumination, perfect for capturing a variety of food subjects.
Utilizing Natural Light Effectively
Positioning your food subject near a window is a common technique to take advantage of natural light in food photography. The window acts as a large light source, casting soft and diffused light onto your subject.
Depending on the direction of the light, you can experiment with different setups and angles to achieve the desired effect. For example, placing the food parallel to the window can create a soft side light that highlights the textures and shapes of the food. Alternatively, positioning the food perpendicular to the window can create a beautiful backlight that adds a touch of drama and depth to your images.
In addition to the window light, you can also use reflectors to enhance natural light and fill in shadows. Reflectors bounce light back onto the food, reducing the contrast and creating a more balanced and pleasing lighting setup.
Reflectors can be made from simple materials like foam boards or white cards, which can be positioned strategically to achieve the desired lighting effect. By experimenting with reflectors and different placements, you can add a touch of creativity and control to your natural light setups.
Avoiding Harsh Shadows
While natural light can create beautiful shadows that add depth and dimension to your food photography, it’s important to be mindful of harsh shadows that can be unflattering or distracting. Harsh shadows can occur when the sunlight is too strong or when the light source is too direct.
To avoid these harsh shadows, you can diffuse the natural light by using sheer curtains or blinds to soften the intensity of the sunlight. Alternatively, you can position a diffuser, such as a white sheet or a professional diffuser panel, between the window and the food subject to create a more gentle and diffused lighting effect. This technique helps to minimize the harshness of the shadows and create a more balanced and pleasing overall image.
Harnessing Artificial Light
Types of Artificial Light Sources
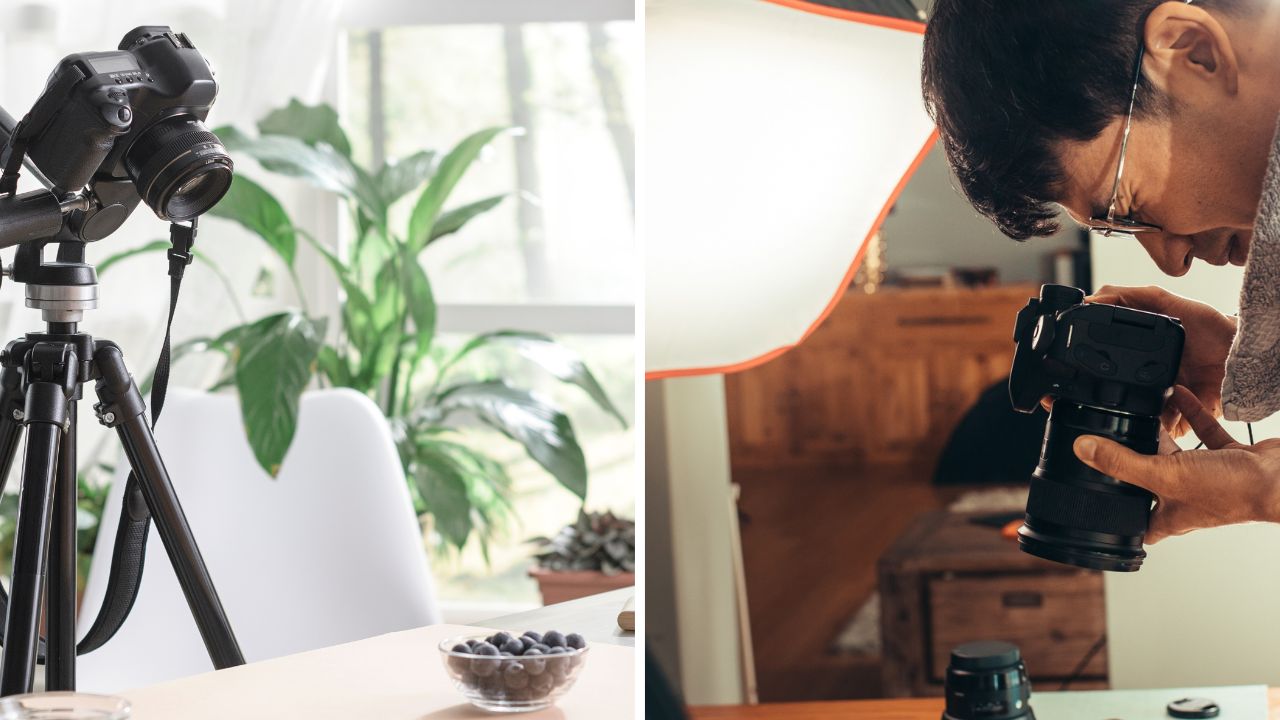
In addition to natural light, artificial light sources play a significant role in food photography. There are various types of artificial light sources to choose from, each with its own characteristics and benefits.
Continuous lighting is a popular choice, providing a constant and steady light source that allows you to see the effects of lighting in real-time. Strobe or flash lighting offers powerful bursts of light that freeze the motion and allow for precise control over the lighting setup. LED lighting has gained popularity due to its energy efficiency, versatility, and adjustable color temperature options.
Advantages of Artificial Light for Food Photography
One of the key advantages of using artificial light in food photography is the control and consistency it offers. Unlike natural light, which can vary depending on the time of day and weather conditions, artificial light allows you to have complete control over the lighting environment.
You can adjust the intensity, direction, and placement of artificial light sources to achieve the desired effect. This control enables you to create a consistent lighting setup, ensuring that your food photographs have a uniform look across different shots or sessions.
Artificial light also provides an opportunity for creativity in food photography. With various artificial light modifiers and diffusers available, such as softboxes, umbrellas, and grids, you can shape and manipulate the light to achieve different moods and effects.
Whether you want to create dramatic shadows, soft and even lighting, or highlight specific areas of the food, artificial light gives you the flexibility to experiment and push the boundaries of your creativity.
Choosing the Right Artificial Light Setup
When harnessing artificial light for food photography, several factors come into play to ensure you select the right setup. One consideration is the wattage and power of the artificial light source. Higher wattage lights provide more power and brightness, allowing you to work in larger spaces or create more intense lighting setups. However, keep in mind that excessively bright lights may require additional light modifiers or diffusers to control and soften the light effectively.
Light modifiers and diffusers play a crucial role in shaping and controlling artificial light. Softboxes, for example, produce a softer and more diffused light, ideal for creating a natural and pleasing look for food. Umbrellas can spread the light wider, covering a larger area and providing a softer overall illumination.
Grids, on the other hand, narrow the light beam and create more directional and focused lighting. Consider the effect you want to achieve and choose the appropriate light modifier or diffuser accordingly.
Color temperature adjustment is another essential aspect when working with artificial light. Different light sources have varying color temperatures, which can affect the overall appearance and mood of your food photographs.


Some artificial lights offer adjustable color temperature options, allowing you to match the desired ambiance or correct any color casts. Understanding color temperature and its impact on your images will enable you to create visually pleasing and accurate representations of your food.
Comparing Natural Light and Artificial Light
Image Quality and Aesthetics
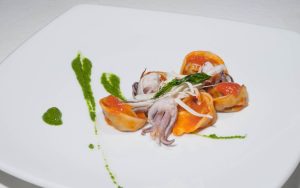
When comparing natural light and artificial light for food photography, it’s essential to consider the impact they have on image quality and aesthetics. Natural light, with its soft and diffused nature, tends to produce a more organic and natural look in food photographs.
The gentle shadows and warm tones that natural light creates can enhance the textures, colors, and details of the food, resulting in a visually appealing image that feels authentic.
On the other hand, artificial light offers a different aesthetic quality. With precise control over the lighting setup, artificial light can provide a more polished and precise look to food photographs. The ability to manipulate the intensity, direction, and color temperature of artificial light allows for creative expressions and the opportunity to achieve a particular mood or style. Whether it’s creating dramatic shadows or emphasizing specific elements of the food, artificial light provides versatility and the ability to tailor the lighting to your vision.
Control over the Lighting Environment
One significant distinction between natural light and artificial light is the level of control they offer over the lighting environment. Natural light, while beautiful, can be unpredictable and constantly changing. The intensity and quality of natural light can vary depending on the time of day, weather conditions, and geographic location. This unpredictability can present challenges when trying to create a consistent look across multiple shots or sessions.
In contrast, artificial light provides a high degree of control and consistency. With artificial light, you have the ability to adjust and fine-tune the lighting setup to achieve the desired effect. This control allows for repeatability, ensuring that you can recreate the same lighting conditions for reshoots or when working on a series of food photographs. The ability to control and manipulate the lighting environment with artificial light provides reliability and precision, making it an attractive choice for photographers seeking consistency in their work.
Practical Considerations
When comparing natural light and artificial light, several practical considerations come into play. Availability and convenience are factors to consider. Natural light is readily available and requires no additional equipment to use. However, it is limited to certain times of the day and can be affected by weather conditions. On the other hand, artificial light can be used at any time, making it more flexible and convenient for shooting food photography, regardless of the location or weather conditions.
Cost and budget may also be a consideration. Natural light is free, while artificial lighting setups can involve some initial investment in equipment. However, the cost of artificial lighting equipment can vary, and there are options available for different budget ranges. It’s important to weigh the benefits and potential return on investment when considering whether to invest in artificial lighting equipment.
Lastly, the learning curve and technical skills required should be taken into account. Natural light photography often relies more on observation and understanding how natural light interacts with the subject. While it still requires skill, artificial light photography may involve a steeper learning curve as it involves understanding and manipulating equipment, controlling light modifiers, and adjusting settings. However, with practice and experimentation, photographers can develop their skills and master the art of both natural light and artificial light photography.
Tips for Successful Food Photography Lighting
Combining Natural and Artificial Light
One effective technique in food photography is to combine both natural and artificial light sources. This approach allows you to take advantage of the softness and organic look of natural light while having the control and consistency of artificial light. Consider using natural light as the main source, positioning your food near a window to benefit from the soft and diffused illumination.
Then, supplement the natural light with artificial fill light to reduce shadows and enhance specific areas of the composition. By striking the right balance between natural and artificial light, you can create visually appealing images with depth and dimension.
Experimenting with Light Direction and Angles
Light direction and angles play a significant role in food photography, shaping the overall mood and highlighting the textures and details of the food. Try experimenting with different light directions to achieve various effects. Side lighting, for instance, can create beautiful shadows that add depth and bring out the textures of the food.
Backlighting can be used to highlight the translucency of certain ingredients or create a halo effect around the subject. Top-down lighting is popular for flat lay compositions, providing even illumination and emphasizing the arrangement of the elements. By playing with different light directions and angles, you can create captivating compositions that enhance the visual impact of your food.
Balancing Light and Shadows
Achieving a good balance between light and shadows is crucial in food photography. While shadows add depth and dimension to the images, excessive or harsh shadows can be distracting or unflattering. To balance the lighting, consider using reflectors or bounce cards to fill in shadows and reduce their intensity.
Reflectors can be placed strategically to bounce light back onto the food from a different angle, reducing shadows and creating a more even illumination. Experiment with different reflector sizes and materials to achieve the desired effect. By effectively balancing light and shadows, you can create visually pleasing images that showcase the food in its best light.
Color Temperature and White Balance Adjustment
Color temperature refers to the warmth or coolness of the light, which can significantly impact the overall mood and color rendition of your food photographs. Pay attention to the color temperature of the light source you’re using, whether it’s natural light or artificial light.
Make adjustments to the white balance settings on your camera or during post-processing to ensure accurate and pleasing colors in your final images. Understanding color temperature and its impact on your photographs will help you maintain the desired color balance and convey the right mood and atmosphere for your food.
Practice and Refinement
Like any skill, mastering lighting in food photography takes practice and refinement. Experiment with different lighting setups, angles, and techniques to discover your preferred style and achieve the desired effects. Don’t be afraid to try new ideas and push your creative boundaries.
Take the time to review your images, identify areas for improvement, and continue to refine your lighting techniques. Over time, you’ll develop a deeper understanding of how light interacts with food, allowing you to create visually stunning images that capture the essence and beauty of your culinary creations.
Conclusion
As we conclude this exploration of lighting tips for food photography, it’s clear that both natural light and artificial light have their unique advantages and considerations. Natural light offers a soft, diffused quality that enhances the natural beauty of food, especially during the golden hour and overcast days. On the other hand, artificial light provides control and consistency, allowing for creative expressions and the ability to shoot at any time or location.